Bobo & Bob, Instructions
How to assemble a Box Frame
How to assemble a Box Frame
First, peel the protective film off of all parts of the box frame. This film may be white, blue or clear and will be on both sides of each piece.
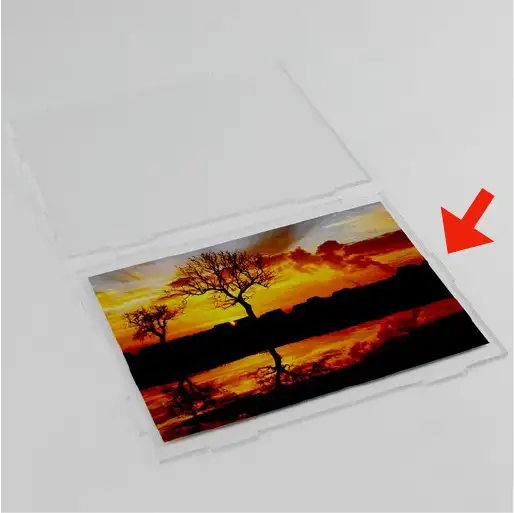
Then stick your required photo to the clear face, this has one tab on the side of it (see image)
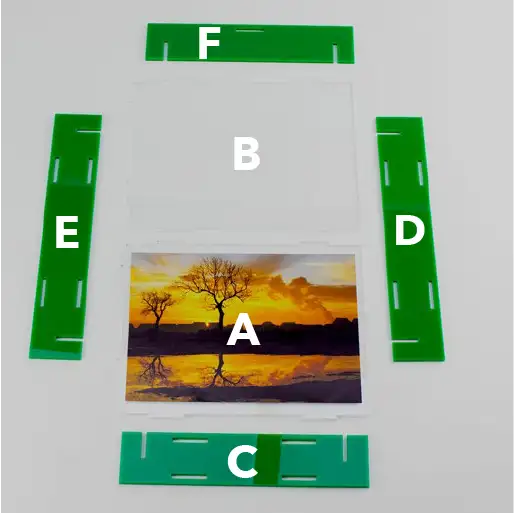
Now, lay out the parts to match that of the photo (left) this will make the assembly process much easier. Keep these letter codes in mind during assembly.
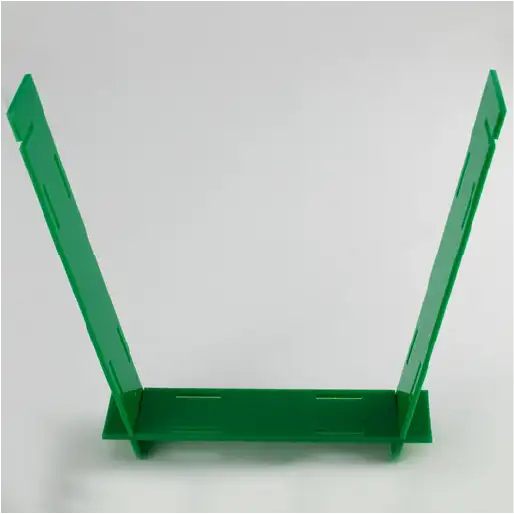
Next, pick up parts ‘D’ and ‘E’ and then slide them into part ‘C’.
After that, pick up part ‘A’ (the piece with your photograph on it) and place it in the slots nearest to you. Then do the same with part ‘B’ this time placing it in the groves furthest away from you.
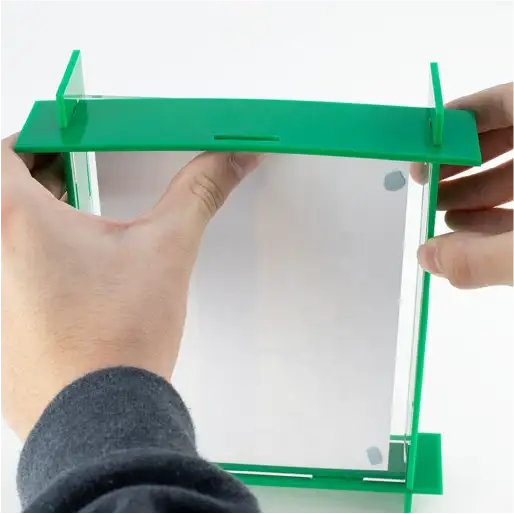
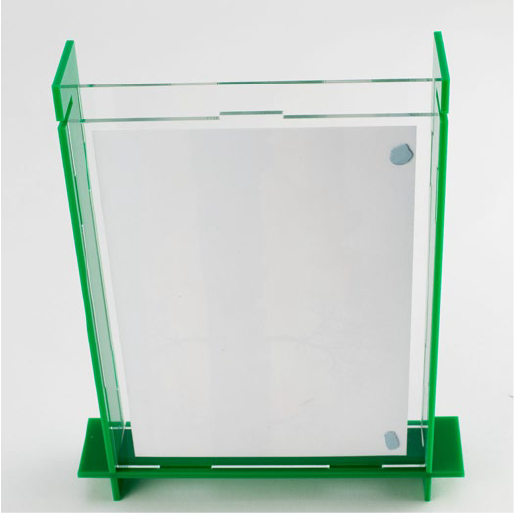
Finally, slide part ‘F’ until it clicks into place as show in the photo (left) and slide it into the remaining groves. You may need to flex this piece slightly to get it over the groove, it does not require much force.
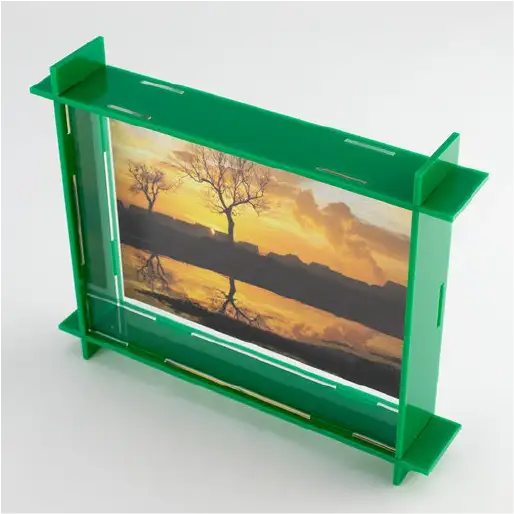
Your assembled Box Frame should now look like this. If you are having issues, please do not hesitate to get in touch: info@boboandbob.co.uk